Once your team is set up on Trainhub, you may need to make changes from time to time—like updating someone’s access level or removing them from your organization entirely. Whether someone has switched roles or left your team, making updates is quick and easy.
Follow these steps to manage team member access:
Step 1: Navigate to Your Team Settings
- Log in to Trainhub and switch to the Admin View
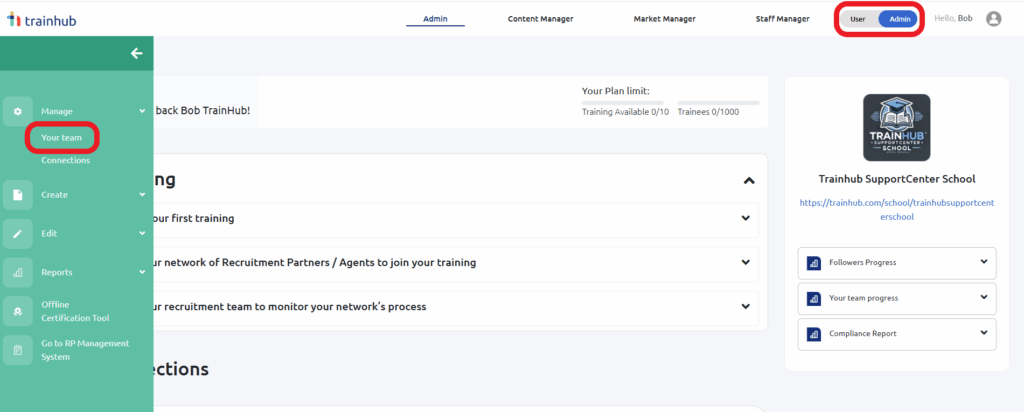
- Hover over the green navigation bar on the left
- Click Manage → Your Team
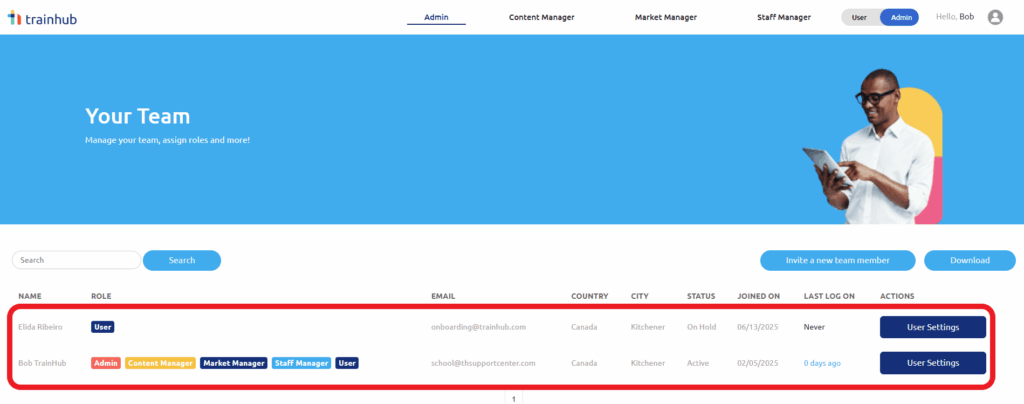
Here, you’ll see a list of all your registered team members along with helpful info like their email, country, join date, and last activity.
Step 2: Edit Access Level
To change a team member’s access:
- Find the person you’d like to update
- Click User Settings next to their name
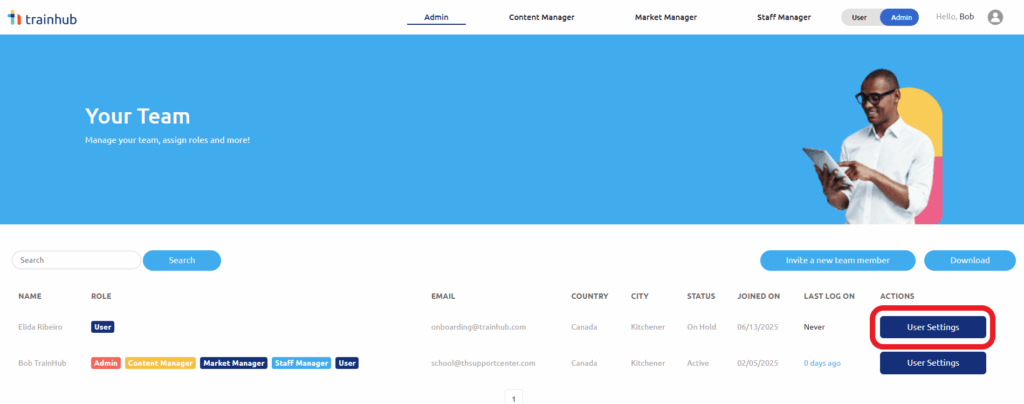
This brings you to the User Settings page, where you can adjust access under two sections: Status and Profile
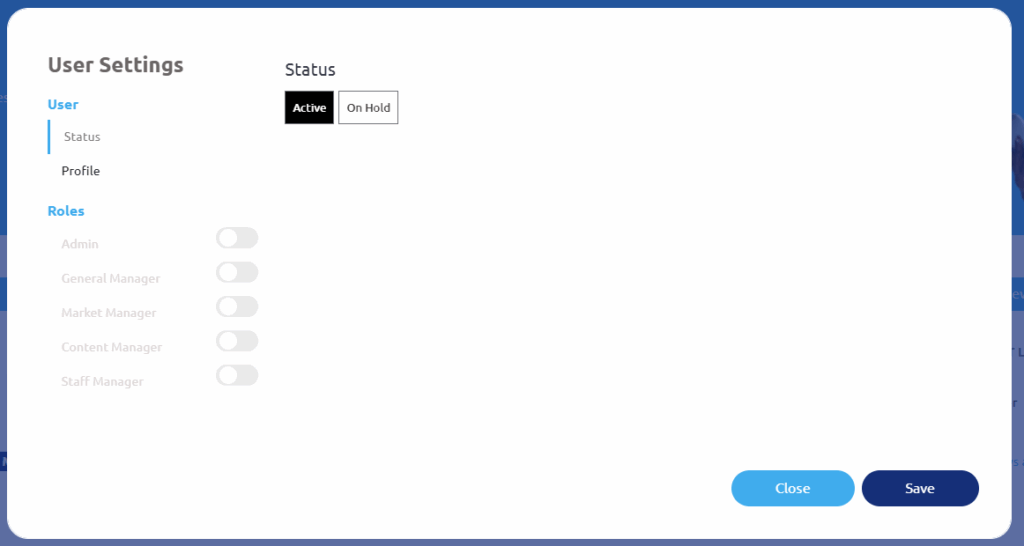
Status Settings
Under the Roles section, you’ll see the different access levels you can assign:
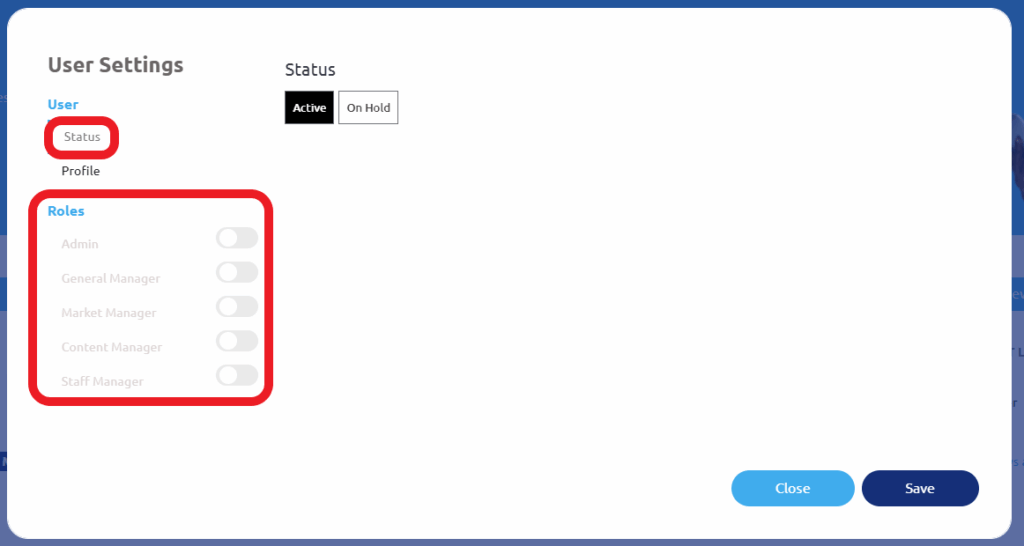
- Admin – Full access to everything on Trainhub, including the ability to assign Admin roles.
Pro tip: Limit this role to 1–2 people for security and clarity. - General Manager – Access to all features except Admin-level controls.
Pro tip: Great for team members overseeing daily operations. - Content Manager – Can create and edit training and resources.
Pro tip: Assign this to whoever owns your training materials. - Staff Manager – Can invite, manage, and remove users. Also manages which trainings their staff can see.
Pro tip: For complex org structures, contact success@trainhub.com for help setting this up right.
To assign or remove roles, use the toggle buttons beside each one. Don’t forget to click Save once you’re done.
Step 3: Put a Team Member On Hold or Delete Their Profile
If someone no longer needs access:
- Under Status, switch their account to On Hold
(This blocks their access but keeps their record)
If you’d like to permanently remove them:
- Set them to On Hold
- Click Delete
- Then click Save
Profile Settings
Still under User Settings, switch to the Profile tab to update public-facing info:
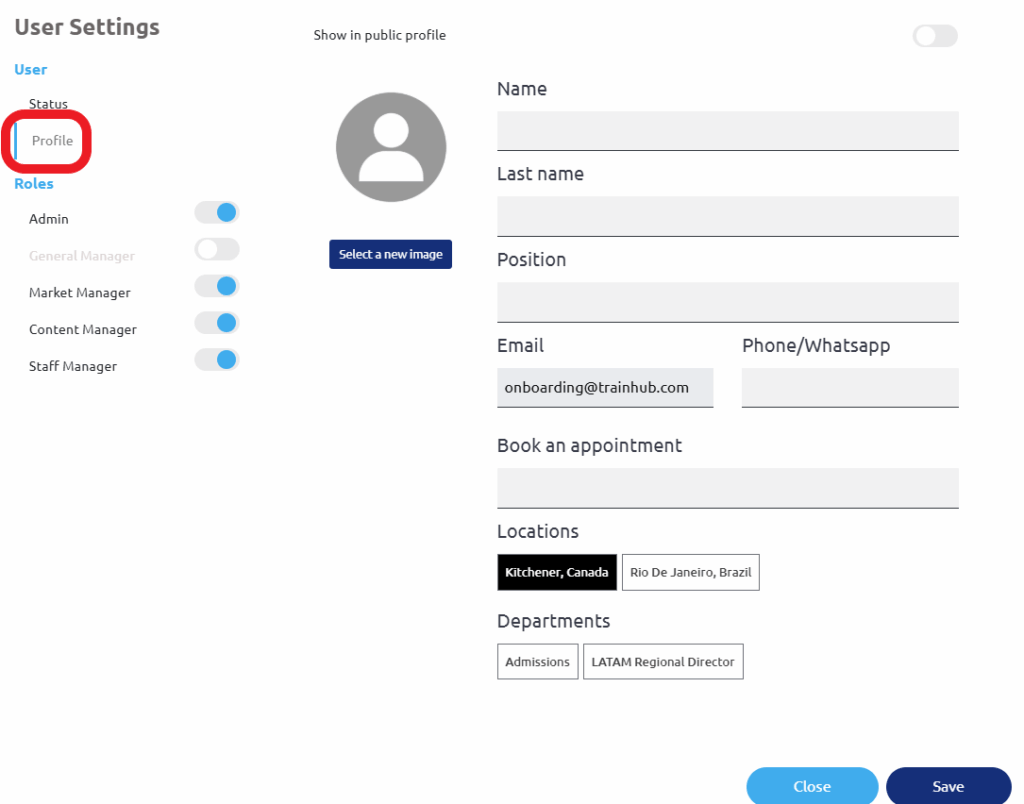
- Add or update their photo, email, phone, or appointment booking link
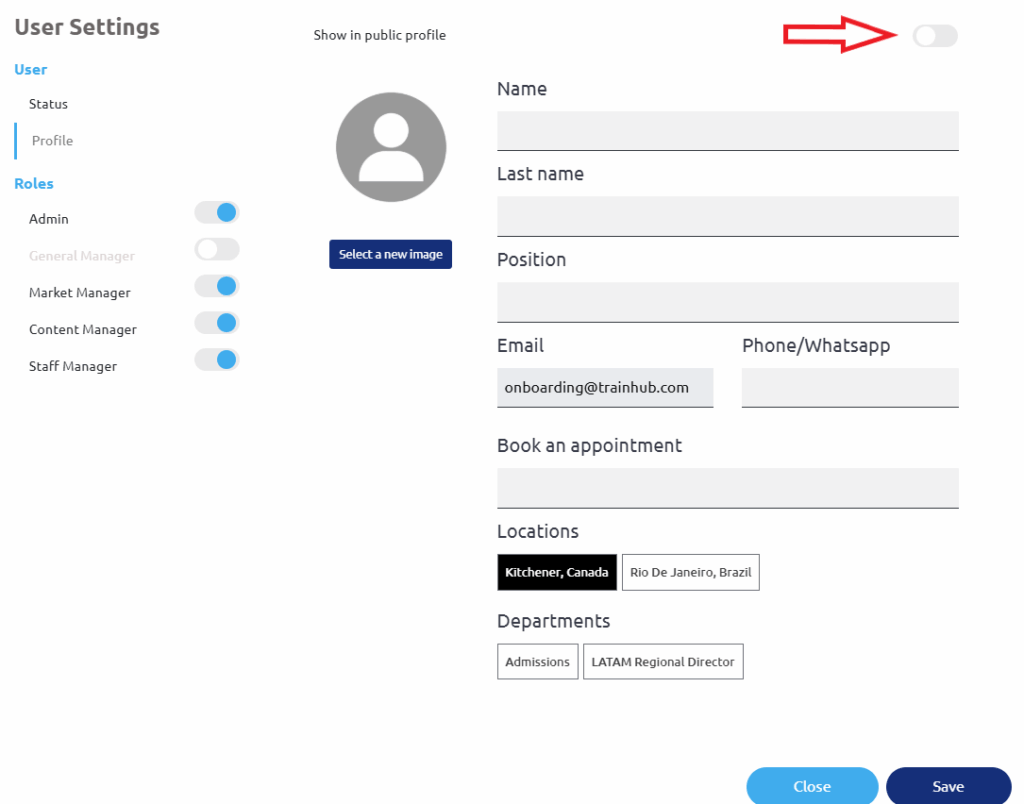
- Decide if this team member should appear on your institution’s landing page
- Use the toggle in the top right to make their profile public or hidden
- Use the toggle in the top right to make their profile public or hidden
Once you’re happy with the updates, click Save.
Need help deciding who should have which role? Or have a large team with unique access needs? Reach out to success@trainhub.com and we’ll be happy to help you set things up.
You’re in control—and now your team setup will be, too.